
Wood floor sanding techniques are essential for maintaining the beauty and longevity of wooden floors. This meticulous process removes imperfections, old finishes, and surface damage, revealing the pristine wood underneath.
Proper sanding not only prepares the floor for a new finish but also enhances the wood’s natural grain, creating a flawless and elegant appearance. Neglecting this crucial step can lead to uneven surfaces, diminished aesthetics, and a shorter lifespan for the flooring.
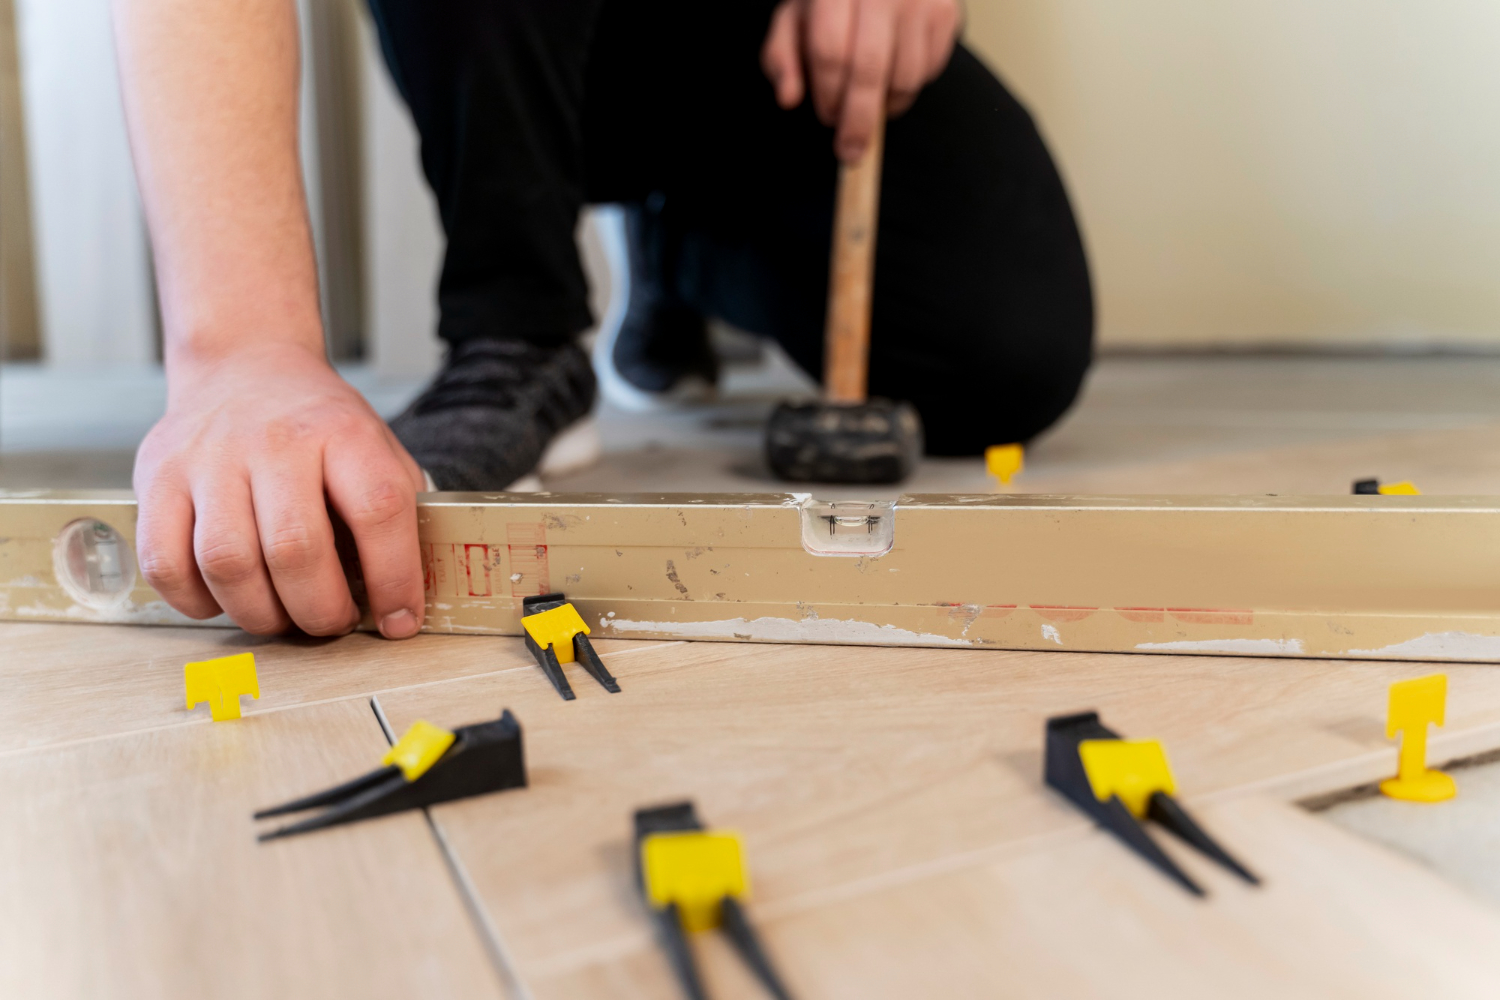
Essential Tools and Equipment
Overview of Sanding Tools Wood Floor School Sanding Birmingham
A variety of tools are essential for effective wood floor sanding. Drum sanders, belt sanders, and orbital sanders are among the primary machines used. Each tool serves a specific purpose, from removing old finishes and levelling the surface to fine-tuning and smoothing the wood.
Hand sanders and edge sanders are also crucial for reaching corners and edges that larger machines cannot access. These tools are integral to achieving professional results in Floor Sanding Birmingham.
Choosing the Right Equipment for Your Project
Selecting the right equipment is vital for the success of any sanding project. Factors such as the size of the floor area, the type of wood, and the desired finish all play a role in determining the appropriate tools.
Investing in high-quality equipment not only ensures better results but also enhances efficiency and reduces the risk of damage to the wood.
Preparation Before Sanding
Importance of Surface Preparation
Proper surface preparation is a critical step that cannot be overlooked. It involves cleaning the floor thoroughly to remove dirt, dust, and debris that could interfere with the sanding process.
Surface preparation ensures that the sandpaper can effectively smooth the wood without being clogged by contaminants, leading to a more uniform finish. This is a fundamental practice taught at wood floor school sanding Birmingham.
Step-by-Step Guide to Preparing Your Floor
- Clear the Room: Remove all furniture, rugs, and items from the room.
- Clean the Floor: Sweep and vacuum the floor to remove dust and debris.
- Inspect for Damage: Check for and repair any loose boards, nails, or cracks.
- Protect Surrounding Areas: Use tape and plastic sheeting to cover baseboards and doorways.
- Choose the Right Sandpaper: Select the appropriate grit based on the condition of the floor and the type of wood.
Sanding Techniques Taught at Birmingham School
Basic Sanding Techniques for Beginners
Beginners are introduced to the fundamentals of sanding, including the proper handling of tools and the sequence of sanding steps. They learn how to start with coarse grit sandpaper to remove old finishes and gradually progress to finer grits for a smooth finish.
Emphasis is placed on maintaining a steady pace and consistent pressure to avoid gouging the wood.
Advanced Techniques for Professionals
For seasoned professionals, the school offers advanced techniques that enhance efficiency and precision. This includes mastering the use of specialised equipment like edge sanders and buffers, as well as learning Wood Floor Sanding Techniques and how to tackle complex projects such as parquet and patterned floors.
Advanced courses also cover troubleshooting common issues and achieving seamless transitions between different wood types and finishes.
Dealing with Common Sanding Challenges
How to Handle Uneven Floors
Uneven floors pose a significant challenge in the sanding process. The key is to identify the high and low spots and address them systematically.
Using a drum sander with the correct grit can help level the surface. In some cases, additional passes with a belt sander may be necessary to achieve a flat, even finish.
Solutions for Sanding Around Obstacles
Obstacles such as radiators, staircases, and tight corners require special attention. Edge sanders and hand sanders are invaluable tools for these areas.
The technique involves careful manoeuvring to sand close to the edges without damaging the surrounding surfaces. Patience and precision are essential to ensure a uniform finish around obstacles.
Safety Precautions During Sanding
Personal Protective Equipment (PPE)
Safety is paramount during the sanding process. Floor Sanding Birmingham emphasises the use of proper personal protective equipment (PPE), including dust masks or respirators to prevent inhalation of harmful particles, safety goggles to protect the eyes, and ear protection to shield against the noise of sanding machines. Wearing gloves and appropriate footwear further ensures safety.
Ensuring a Safe Working Environment
Creating a safe working environment involves more than just PPE. It’s important to ensure the workspace is well-ventilated to disperse dust and fumes.
Keeping the area free of tripping hazards and maintaining a clean, organised workspace also contribute to a safer and more efficient sanding process.
Conclusion
Mastering the art of wood floor sanding requires a blend of theoretical knowledge and practical experience. Floor Sanding Birmingham School’s comprehensive training programmes equip individuals with the skills and confidence needed to achieve professional results.
By understanding the importance of proper sanding techniques, choosing the right tools and finishes, and adhering to safety guidelines, one can transform any wood floor into a stunning, durable masterpiece. For more information, Call Us.


